Haven Protocol Web App
Start a Local Development Node
You’ll need to either build from source or grab the cli files from the Releases page
There are linux, MacOS and Windows binaries available, download and decompress the ones you require. I’ve downloaded and decompressed to a haven subfolder in my home directory.
First check that the daemon is executable
ls -l ~/haven/havend
if its not
chmod +x ~/haven/havend
The Haven daemon shares the same daemon option as the Monero daemon, the list of switches can be found at Monero Docs
You need to allow the web server to connect to the daemon by setting auth username and password and HTTP CORS headers.
The following command should be able to start up the daemon using this command
~/haven/havend --testnet --rpc-access-control-origin=http://localhost:3000 --rpc-login=super:super
The “super:super” username and password is set within the web app code
You should see the daemon start to sync with the network, it can take some time for it to complete.
Once the daemon is synced you can type commands into the runnign console eg. status, exit, version, sync_info and help for a full list
Mining on testnet
To get funds for testing you need to enable mining on testnet / stagenet its easiest is via the command line wallet.
Create a new wallet by running the wallet cli without specifying a wallet
~/haven/haven-macos/haven-wallet-cli --testnet --daemon-login=super:super
While generating the wallet it will ask if you want to enable mining (Y) Or once you have logged into your wallet you can enable it using
[wallet hvxxxM]: set setup-background-mining 1
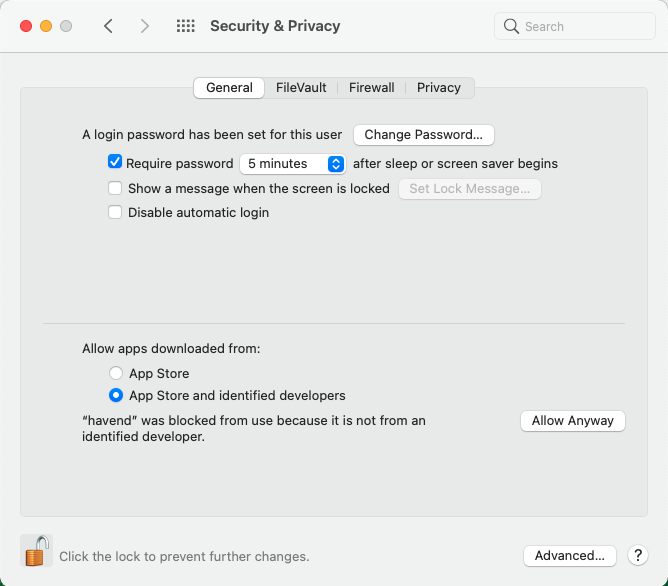
Mac Users
Note if you’re on a mac you will need to allow the daemon to run in System > Security & Privacy, after the first run you can allow it via the Allow button.